So, you (or your kids) watched Finding Nemo or Dory-that must have been so fun and exciting, and now you’re googling “how hard is a saltwater tank?”
Short answer: It isn’t hard, it just takes time. You absolutely can build a beautiful saltwater aquarium at home. But you’ll need a better plan than “just keep swimming” if you want your fish to live long, happy lives all while keeping your sanity.
This guide walks you through setting up your first saltwater aquarium, step by step, in plain language. We’ll cover:
- What kind of tank you should start with
- The equipment you need (and what can wait)
- How to set everything up without crashing your tank
- When to add fish and clean-up crew
- How Pure Reef in Alpharetta can help you at every step
Grab a snack, maybe a notebook, and let’s build your first little ocean.
Step 1: Decide What Kind of Saltwater Tank You Want
Before you buy anything, decide what you’re aiming for. There are three main types of saltwater tanks:
- Fish-Only (FO)
- What it is: Just fish and maybe some decorative rock or fake coral.
- Good for: People who want colorful fish without worrying about coral.
- Pros: Cheapest and simplest type of saltwater setup.
- Cons: You won’t get that “mini-reef” coral look.
“Fish are friends, not decor. When you plan your tank type first, you’re building a home, not just filling a glass box with random swimmers.”
- Fish-Only with Live Rock (FOWLR)
- What it is: Fish + real rock from the ocean (or cultured rock) that brings in beneficial bacteria.
- Good for: Beginners who want a more natural look and better filtration.
- Pros: More stable system, rock helps process waste.
- Cons: Slightly more expensive than basic fish-only.
- Full Reef Tank (Fish + Corals + Inverts)
- What it is: Fish, corals, snails, shrimp, crabs — the whole underwater city.
- Good for: People who are okay learning a bit more and being patient.
- Pros: Stunning, colorful, and super rewarding.
- Cons: Requires better lighting, more stable water, and a little more attention.
Newbie tip from the Pure Reef crew: If this is your very first tank, a FOWLR or soft-coral reef is the sweet spot. You get the look you want without jumping straight into the deep end.
Step 2: Choose the Right Tank Size & Location
What size tank should you start with?
Counter-intuitive but true: tiny tanks are not easier.
A slightly larger tank is more forgiving when (not if) things go a little off.
- Good starter size: 20–40 gallons
- “Hero” starter size: 40–75 gallons (especially if you want a reef)
Smaller than 20 gallons = every little mistake swing water parameters like crazy. Bigger than 75 for your first tank can be a lot to manage (and move).
Where should you put the tank?
Pick a spot that is:
- Out of direct sunlight (to avoid algae blooms and crazy temperature swings)
- Near an outlet (you’ll need several plugs)
- On a strong, level surface (water is heavy — 8.3 lbs per gallon)
- Where you actually hang out (you want to enjoy it!)
“Nobody wants to be the fish stuck in a cramped dentist tank. Give your future crew some room to explore and hide, and you’ll enjoy watching them a lot more.”
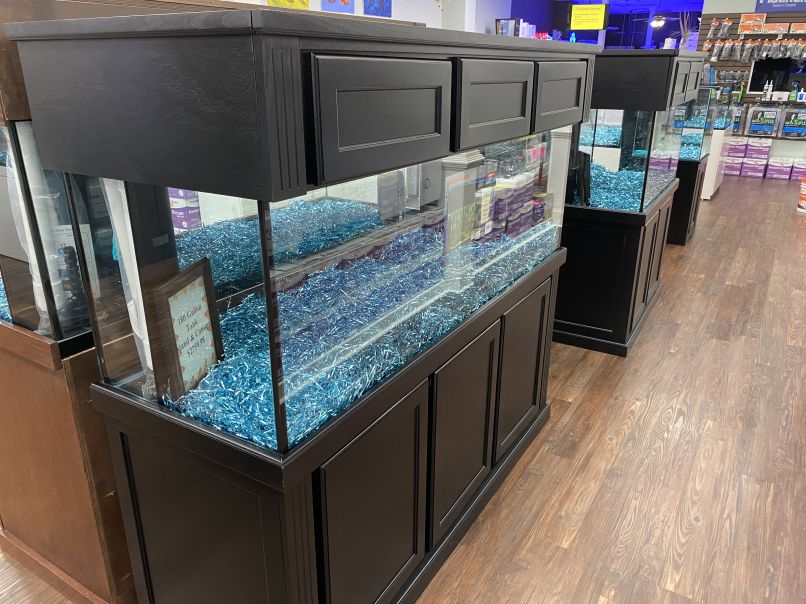
Pure Reef tip: Before you buy anything, snap a picture of the spot and measure the width of the area. Bring that into Pure Reef in Alpharetta and we’ll help you pick a tank and stand that actually fit your space and your life.
Step 3: What You Actually Need – The Beginner Equipment Checklist
Let’s keep this simple. Here’s the core gear you need to get started:
Tank & Stand
- Glass or acrylic aquarium (20–75 gallons)
- Sturdy stand made for aquariums
How Pure Reef helps: We keep a range of tanks and stand in stock and can talk through pros/cons of different shapes and sizes based on what you want to keep.
Filtration
You have a few options:
- Hang-on-back (HOB) filter – Easiest for smaller tanks.
- Canister filter – Works for fish-only/FOWLR if maintained well.
- Sump – A separate tank under the main one. Great for hiding gear and more advanced setups.
For your very first saltwater tank, a good HOB filter or simple sump is usually enough.
Heater & Thermometer
- Quality heater sized for your tank volume
- Simple digital or stick-on thermometer
Target temp: around 78°F (a steady temp is more important than the exact number).
Powerheads (Water Movement)
Reef fish and coral like flow:
- Small powerheads/wave makers to keep water moving
- Aim for a gentle, random flow — not a firehose blasting one spot
Lighting
What you choose depends on tank type:
- Fish-only / FOWLR: Standard aquarium LED is usually fine.
- Reef (with corals): You’ll want reef-specific LED lighting that can grow coral long term.
If you’re not sure, come in and tell us what you dream the tank will eventually look like — we’ll match you to the right light and show you real tanks in the store using similar setups.
Rock & Sand
- Rock: Live rock, dry rock, or a mix. This is your main biological filter.
- Sand: Fine sand or special reef substrate (optional but looks nice and adds surface area).
Salt Mix & RO/DI Water
- Salt mix: Marine salt formulated for reef tanks.
- RO/DI water: Purified water used to mix salt and for top-offs.
You can buy RO/DI water and salt mix at Pure Reef and we can help you figure out how much you actually need for your tank size.
Test Kits
At minimum, you’ll want to test:
- Ammonia (NH3/NH4)
- Nitrite (NO2)
- Nitrate (NO3)
- pH
(For reef tanks later: calcium, alkalinity, magnesium, phosphate.)
Pure Reef shortcut: Bring in your water and we’ll test it for you and explain what the numbers mean in real-world terms not just “red is bad, green is good.”
Step 4: Set Up Your Tank – Rock, Sand & Aquascape
Now the fun part: underwater Lego time.
- Place the tank and stand where you want it. Double-check its level.
- Rinse the sand with RO/DI water until the water runs clearer.
- Add rock first:
- Place rock directly on the glass or stand supports (not just on sand).
- Build arches, caves, and “islands” for fish to swim through and hide.
- Add sand around the rocks so your rock structure is stable.
Aquascape tip: Leave space between the rock and the glass so you can clean the glass, and water can flow around everything.
If you want help designing a rock layout that looks good and works for fish/coral, show us pictures of your tank and rock at Pure Reef and we’ll help you brainstorm an aquascape.
Step 5: Add Water & Mix Your Salt
There are two ways to do this:
Option A: Mix salt in the tank
- Fill the tank with RO/DI water.
- Add powerheads to get water moving.
- Add salt mix slowly, following the directions on the bag/bucket.
- Let it mix for several hours and then test salinity with a refractometer or hydrometer.
Option B: Mix in a separate container
- Mix RO/DI water and salt in a clean bucket or mixing container.
- Once it’s fully dissolved and at the right salinity, add to the tank.
Target salinity:
- Around 1.025 specific gravity (or 34–35 ppt).
Safety net: If numbers freak you out or your tester looks confusing bring a water sample to Pure Reef. We’ll check your salinity and show you how to read your own tools.
Step 6: Cycle Your Tank (Let the Good Bacteria Move In)
This is the part everyone wants to rush. Please don’t — your fish will thank you.
What is “cycling”?
The nitrogen cycle is how your tank deals with fish waste and leftover food:
- Waste becomes ammonia (toxic).
- Bacteria convert ammonia into nitrite (still toxic).
- Different bacteria convert nitrite to nitrate (less toxic, removed with water changes).
Cycling is just giving those helpful bacteria time to grow before you add fish.
How to cycle
- Add a bacteria starter (bottle of live bacteria) if you like.
- Add a small pinch of fish food or a pure ammonia source.
- Run your filter, heater, and powerheads like normal.
- Test the water every few days for:
- Ammonia
- Nitrite
- Nitrate
You’ll know the cycle is complete when:
- Ammonia: 0
- Nitrite: 0
- Nitrate: Present (not zero)
This can take anywhere from 2–6 weeks depending on your setup and whether you used starter bacteria.
Cycle sanity check: Not sure if it’s done? Bring us your water. The Pure Reef team will test it, walk you through the numbers, and tell you if your tank is ready for fish or needs more time.
“If you’re ready to go beyond movie magic and give your ‘Nemo’ and ‘Dory’ a stable home, bring your questions (and your kids) into Pure Reef. We’ll help you build a tank that keeps everyone swimming for real.”
Step 7: Add Your First Fish & Clean-Up Crew
Once your tank is cycled, you can finally add life — slowly.
Start with hardy, peaceful fish
Examples (depending on your tank size):
- Clownfish
- Some gobies
- Certain wrasses
- Dwarf reef-safe species
Avoid things like tangs or big messy fish in a small first tank.
Add a clean-up crew
These are your tiny janitors:
- Snails
- Hermit crabs (reef-safe species)
- Maybe a shrimp or two
Add a few at a time so the system can adjust.
Stocking plan help: Bring your tank size, equipment list, and wish list to Pure Reef. We’ll help you build a step-by-step stocking plan so you don’t overload your system.
Step 8: Start a Simple Weekly Routine
To keep your new reef from turning into a green swamp, set a simple schedule.
Every day (1–2 minutes)
- Quick look at fish: eating? acting normal?
- Check temperature.
- Make sure gear is running.
Once a week
- Test salinity and top off evaporated water with fresh RO/DI (not saltwater).
- Wipe the glass.
- Test at least: nitrate and (early on) ammonia/nitrite.
- Do a small water change (10–20%) once nitrates start climbing.
Once a month (or every few weeks)
- Rinse filter media (in tank water, not tap) or replace as needed.
- Clean powerheads and skimmer cup if you have one.
- Check your rock and sand for detritus buildup.
Feeling overwhelmed? You’re not alone. Many of our regulars at Pure Reef started exactly where you are. We can walk you through this routine in person or talk about maintenance services if you’d rather just enjoy the tank and let someone else handle the messy part.
How Pure Reef Can Help at Every Step
You don’t have to figure out all this alone (or trust random internet strangers).
Here’s how Pure Reef in Alpharetta can make your first tank way less stressful:
- New Tank Consult: Come in with your phone and your space measurements; we’ll help you choose a tank, equipment, and a realistic stocking plan.
- Custom Starter Bundles: We can build you a “Day 1” package so you’re not buying a bunch of things you don’t need.
- Free Water Testing: Bring your water and we’ll test it, explain your numbers, and help you fix issues before they become disasters.
- Livestock Advice: Tell us your dream fish and corals; we’ll tell you what works in your tank and what order to add things.
Think of Pure Reef as your local reef community hub, not just a store. The fish need a healthy ecosystem — and so do the people who care for them.
FAQs
Is saltwater way harder than freshwater?
It’s more involved, but not impossible. It’s like baking vs. cooking: you just have to measure a bit more and be patient.
How long before I can add fish?
Plan on at least 2–4 weeks for the tank to cycle. Testing your water is the only way to know for sure.
Can I use tap water?
We strongly recommend RO/DI water. Tap water often brings in things like chlorine, heavy metals, and nutrients that fuel algae.
What if something goes wrong?
Take pictures, bring a water sample to Pure Reef, and tell us what you’ve done so far. We troubleshoot situations like this every single day.
If you’re ready to start your first saltwater tank, come see us at Pure Reef in Alpharetta. Bring your ideas, your questions, and a picture of the spot where your future reef is going to live — we’ll help you turn “I hope I don’t kill everything” into “Wow, I actually did this.” 🌊🪸🐠